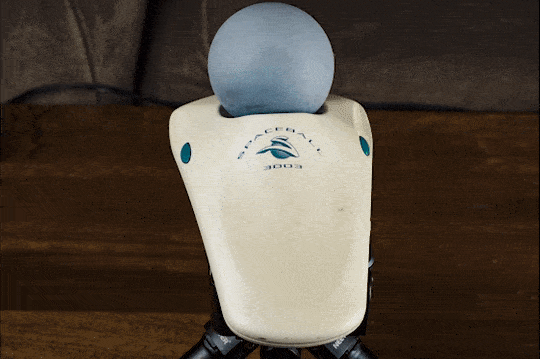
A few people asked me about my workflow for doing photogrammetry scans of small to medium-sized object (mainly keyboards). This is the turntable workflow that I have used successfully after many poor scans. Keyboards are particularly tricky because they are so flat (lacking geometry), so it can be difficult to get the top and bottom to recognize each other. For this example I chose to scan a unique trackball that I have, called Spaceball 3000.
Overview
The goal of this workflow is to capture all sides of an object. This is accomplished by taking taking photos at multiple angles while the object rotates on a turntable. The important technique here is to first generate some rough meshes of the object from each angle, trim the meshes to ignore the turntable/stand, and finally realign all of the newly masked photos.
Capture (Photos)
I used an 85mm lens at f/8 aperture and took 160 photos total (30 photos * 6 angles). I have an automatic turntable that is triggered to move after each photo, so this part of the process is mostly automated for me now. In the past I’ve used a camera remote trigger in one hand and a turntable remote control in the other to take the photos and advance the turntable manually.
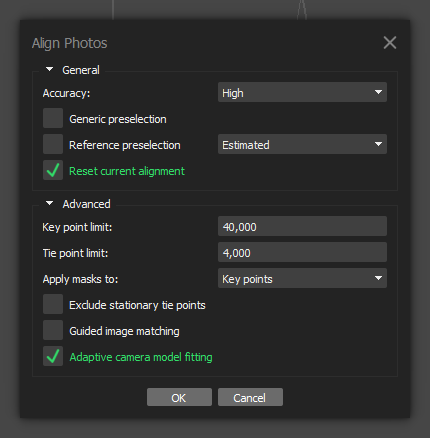
Initial Photo Alignment
Import the images into separate chunks, one for each camera angle (e.g. 6 chunks for me). Then I run camera alignment on each separate chunk with the following alignment settings:
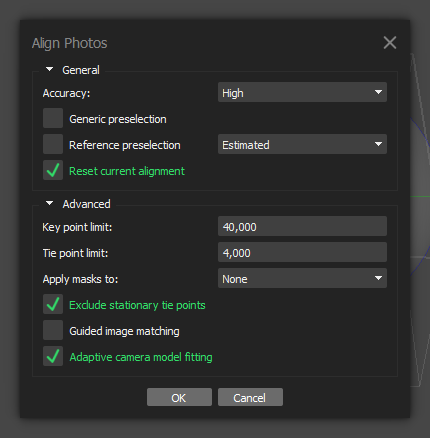
These are the two key settings:
- Apply masks to: None
- We do not have any masked images
- Exclude stationary tie points: Yes
- This will tell the software to ignore non-moving background features
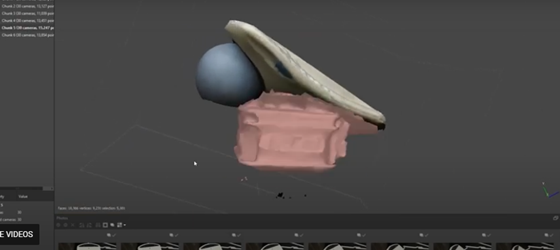
Initial Mesh Generation
The next step is to generate meshes for each of the chunks. At this point I’m not interested in having a perfect model, only good enough to extract masks from. These are the settings that I use:
After the meshes have been generated, I delete the parts that contain the stand/turntable. I find the lasso select tool the most useful for this step.
Import Masks from Models
Right click on any image and select Masks > Import Masks. The method for import should be Model and applied to Entire Workspace. These are the default settings to use:
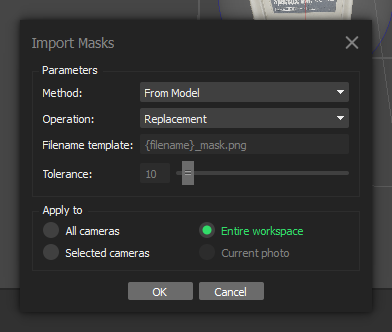
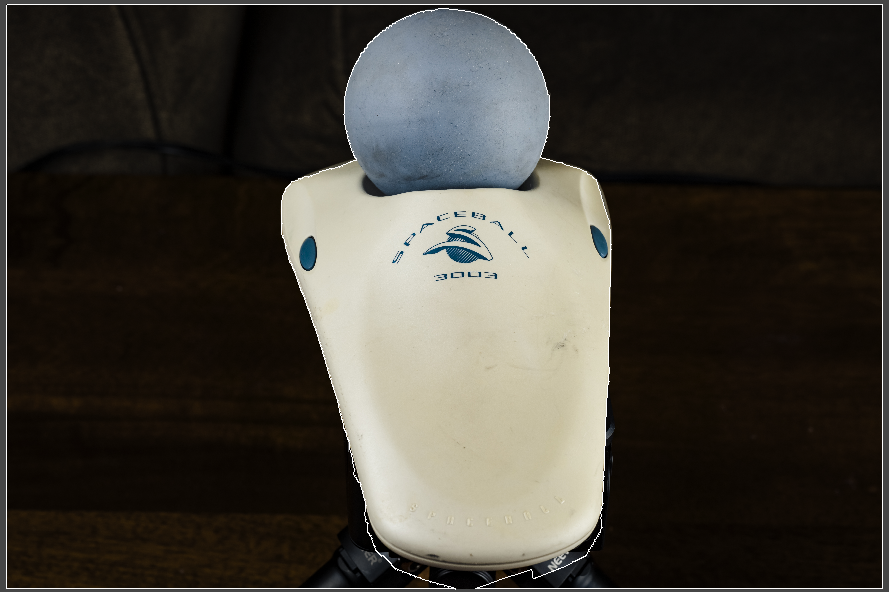
This will analyze each image against the mesh and mask out any parts that have been deleted from the model. This will allow us to align all photos in the set as a single chunk, which usually gives a better result than merging chunks.
Align Masked Photos
Move all photos from the separate chunks into a single chunk. Run photo alignment on the new chunk with the following settings:
This time the important differences are:
- Apply masks to: Key Points
- This will tell the software to only look for features and do matching on the unmasked portion of the images
- Exclude stationary tie points: No
- The background features have been masked out from the images
After running photo alignment, it’s best to delete bad points and optimize the alignment. Use the Gradual Selection (located in the Model menu) and select bad points using each of the tools. Delete the bad points and run optimize cameras between each tool.
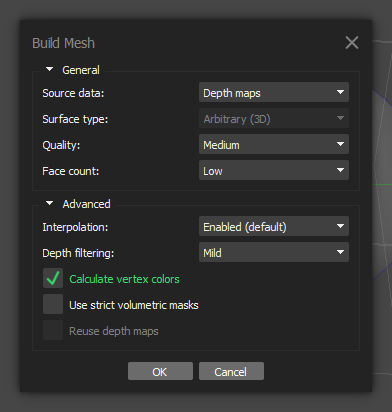
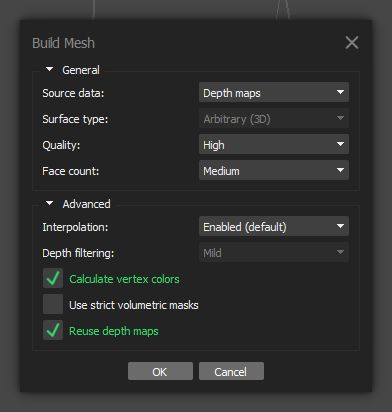
Generate Mesh
Next I run generate mesh with the following settings:
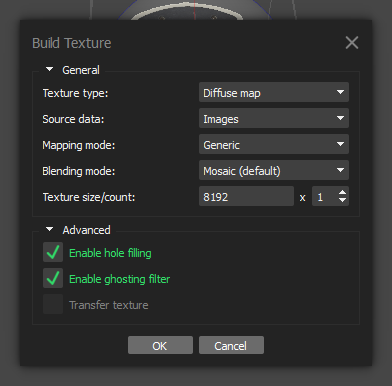
Build Texture
Finally, I build the texture with these settings: