Intro
Until very recently, my dabbles with photogrammetry scanning have been limited to reproducing interesting keyboards. As I’ve worked my way through most of my collection, and as I’ve become somewhat less involved in keyboard things, I have just now started to play around with other applications for photogrammetry.
Where keyboards posed one primary challenge (how to scan a flat object), and while it can be difficult to “pose” a keyboard in order to scan all sides cohesively, they generally do a good job of sitting still for the camera without much fuss. Live subjects, on the other hand, can be a different animal all together. And speaking of animals, wouldn’t an animal make an interesting subject to scan (if done well). At least that was my thinking, so that’s what I set out to experiment with next.
My pet cats seemed like a good enough live subject to start with; they’re always hanging around in predictable spots, can hold relatively still, and aren’t camera-shy. In this post, I’ll be going over the proof-of-concept work I’ve been playing with for scanning live subjects. Some of the things I’ve learned are specific to this type of use case, but I’ve also come to understand some of the techniques and characteristics of a proper photogrammetry scan, regardless of subject.
Capture
The challenge with scanning a live subject is an obvious one: how do you capture enough images to feed the software without having your subject move around. So perhaps my solution is equally obvious: use high frame rate slow-motion video. Fortunately, the technology has caught up to a point where decent slow-motion video is pretty accessible and not much of a barrier any longer.
In my example, for instance, I used an iPhone 14 Pro to take an 8 second clip of my cat sitting on a bed. The new iPhones are capable of taking 240 FPS video, but for my needs I set it to 120 FPS, since the extra frame rate would have been overkill and plus I’d need a lot more light to get the desired result. One thing to note is that high frame rate video on the iPhone is limited to 1080 resolution, but I’ll explain later how I sort of got around that.
To take the video clip I simply moved the camera in a circle, trying to move slow enough to avoid motion blur but quick enough to avoid her moving. The first few times I did this she would move her head to watch my hand but then got bored with my shenanigans and stood still for me after that. Another important thing to remember is to try to keep the camera a relatively equal distance from the subject as you move. Here’s the video I used for this experiment (Note: I’ve optimized this video for the web so it’s not the true original).
Video Editing
The next step was to edit the video a bit. At a minimum it’s important to simply trim the video down to the bare minimum length you need. Extra frames could mean that you’re introducing unwanted information for the software to process, which might distort the mesh and/or texture during processing. You’ll notice in my sample above that she blinked at the very end. I should have trimmed that part out originally, but instead I removed those extracted frames after the fact.
Basic Corrections (Optional)
If the video lighting needs some help or you want to correct the colors a bit, you can further edit the video to achieve this. I tweaked the levels a bit in Premiere, but didn’t go crazy with it, since I figured it was pretty decent as it was. That said, it can be helpful to try to blow out the shadows and tweak the contrast to make it more palitable to the photogrammetry software.
Enhancement (Optional)
This was probably the most interesting part of my workflow, and helped quite a bit. I mentioned earlier about the resolution limitations I had when taking the video. That was one aspect I wanted to improve before processing it. The other aspect I wanted to improve was to remove some of the grain and sharpen the video a bit.
I recently started experimenting with the Topaz Video AI application, which uses artificial intelligence to enhance video. It has a number of different AI models that you can throw at the video to improve certain properties depending on your needs. For my video, I wanted to upscale the resolution to 4K and degrain/sharpen it. The software isn’t magic, so the best results obviously come from having a good original video. But it’s quite impressive at what it can do, even with a low/medium quality video like I had. It doesn’t show very much in the sample below, but this did actually make a huge difference in the finished model.
Frame Extraction
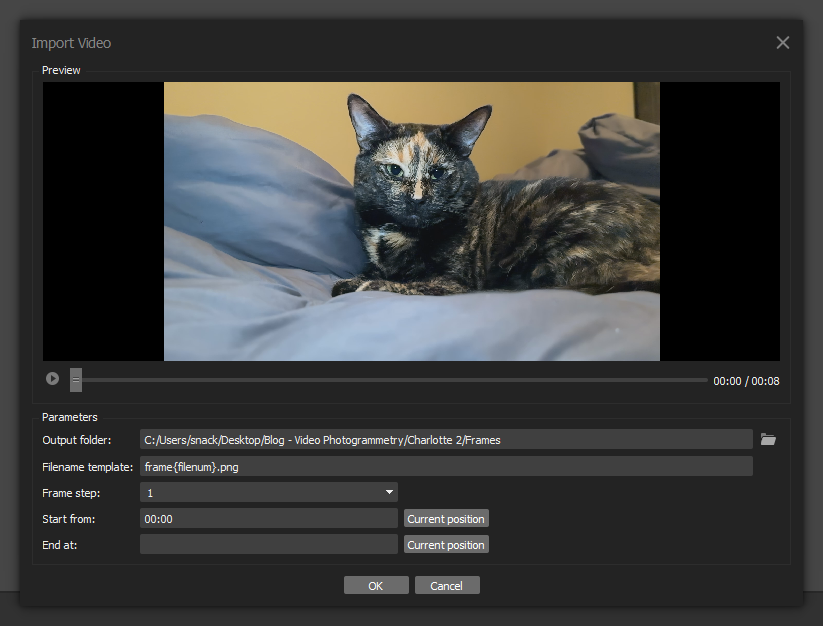
Now it’s time to jump into the photogrammetry software. The purpose of this step is to extract a series of images (frames) from the video. Depending on the frame rate and length of the video, it makes sense to tweak the parameters in order to avoid getting too many or too few inputs. I try to shoot for around 500 extracted frames. Since I was working with a very short clip, I set the “step” parameter to a value of 1 (i.e. extract all of the frames). You can also specify the in/out points of the video, but since it was already trimmed down this was not necessary. The images will save to a directory that you specify in the popup.
Additional Corrections (Optional)
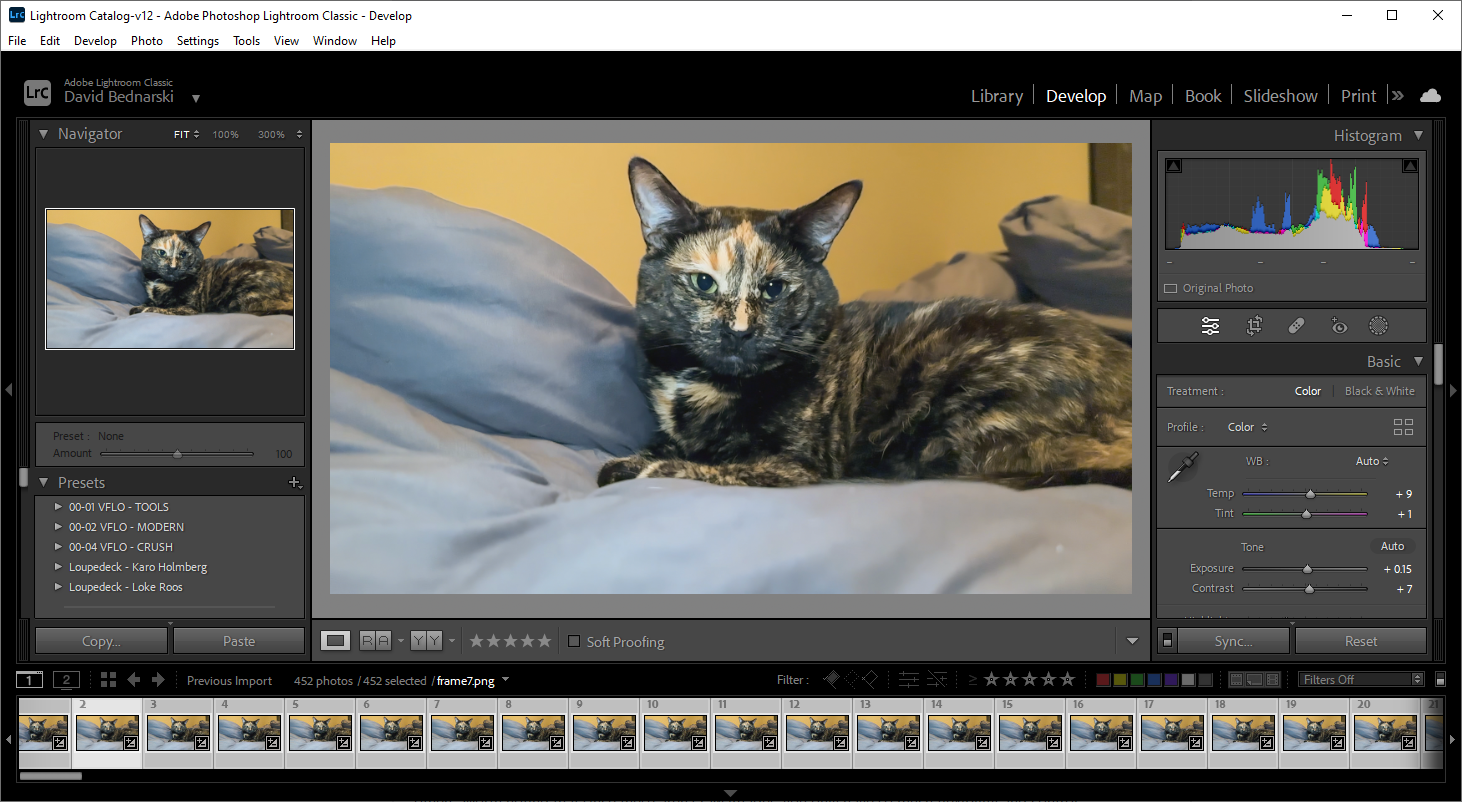
This part is probably unnecessary but I’ve used it in the past to get slightly better results. Basically you can load the images into Lightroom and further tweak the exposure, color balance, etc. It might be useful to do on a subset of the image set or to use the “match total exposures” feature to balance out images if some are brighter than others. Worth noting that since these aren’t raw images, you only have so much flexibility and control.
Additional Enhancement (Optional)
Now to get totally over the top and excessive, I played around with another image refinement step. In addition to the Video AI program, Topaz also has a Photo AI application which can be used to enhance pictures. If you had to do this process one image at a time, it would obviously not make any sense. But there is a bulk processing feature which can use some intelligent “autopilot” settings to churn through all of the images in a big batch. The autopilot feature has some limited control over which enhancement opertions it will try to perform. Basically it evaluates each image and depending on what aspects it feels need enhancing (e.g. denoise, sharpen) it will attempt to make the output better quality. Similar to the Video AI program it can also be used to upscale images. In practice, I scrapped this step because it was making my finished textures too sharp and the model looked much better with some softness to it. It adds a good amount of time to the process anyways. But may be useful in some other use cases. Plus the Video AI program already did a nice enough job of fixing those aspects for me already.
Photogrammetry Workflow
Back in the photogrammetry software, the workflow was pretty similar to what I’ve been used to in the past. But there were a few new things I learned that might be helpful to get a nice result.
Align Photos
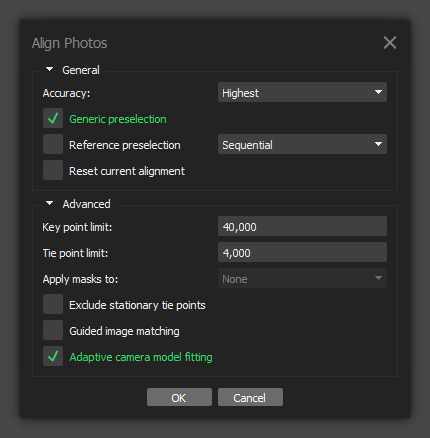
Below are the alignment settings that I used for this scan, along with my rationale/thinking for certain ones.
Accuracy - I usually use “Highest” unless it’s an enormous set. My understanding is that this has the potential to introduce additional tie points that are lower-confidence, but I haven’t played around too much with it to know. When in doubt, you can always duplicate your chunks and try different settings.
Generic preselection - This is pretty necessary if you’re processing a large image set like this, so best to turn it on.
Sequential - Since the images were extracted in order from a video file, my understanding is that this setting helps the software to optimize the matching process.
Adaptive camera model fitting - I usually enable this if the images are not calibrated. It might be a good idea to go through the calibration steps for your camera so that you can just load it up anytime you shoot something on it, but Metashape usually does fine without it in most circumstances.
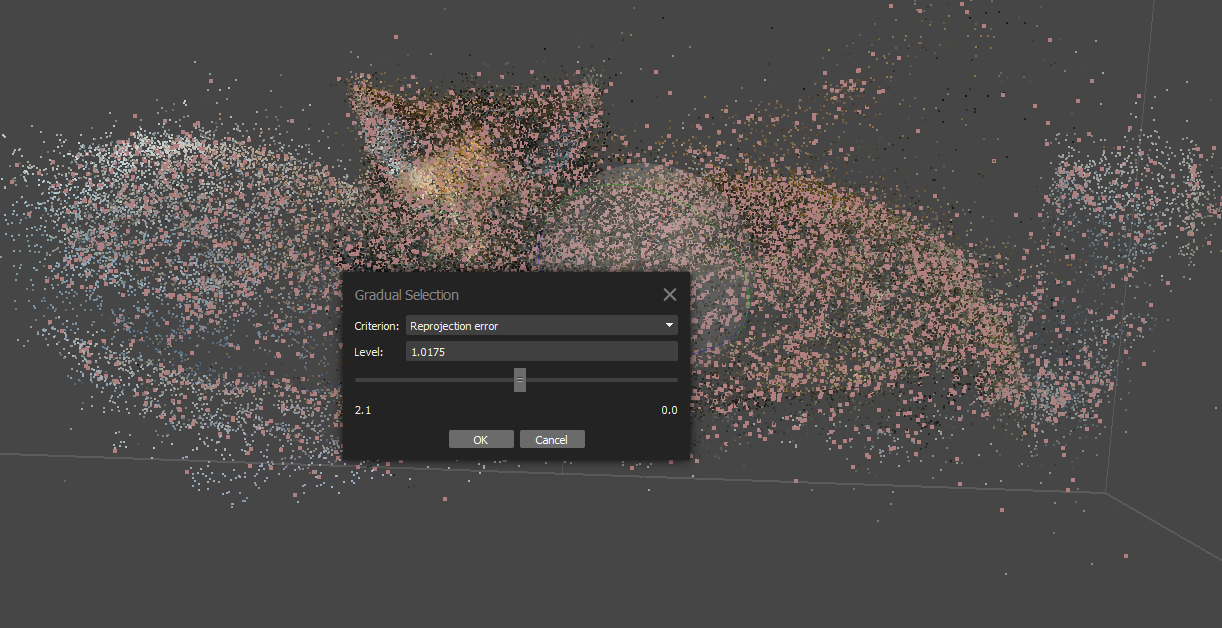
Optimize Cameras
Once alignment is complete and you have your sparse cloud, it’s pretty important to use the Gradual Selection tool to remove “bad” points, then run the “Optimize Cameras” command to refine the camera alignments. I won’t pretend to know how many points to select for each setting, as I’ve seen varying things online, but doing it at all really improves the end product.
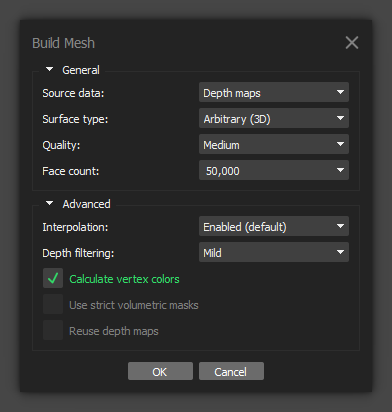
Build Mesh
This is another step that’s best to run with different settings on a few duplicated chunks. What I’ve found over time is that a lot of times my model will turn out better with lower settings (medium/low). Too high of settings adds detail where it doesn’t belong and the model turns out bumpy. So I either ratchet down the quality and/or the face count to something reasonable.
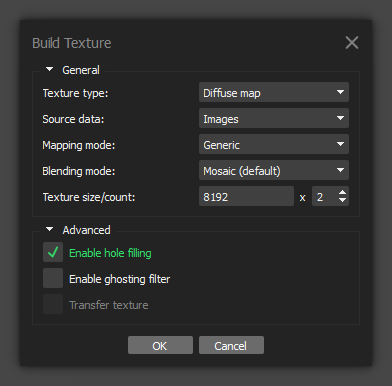
Build Texture
This is another step that I am not yet well educated on. I generally don’t like the default settings so I set the size to 8192 x 2. I’m not sure if that’s overkill, but it does produce a good result so I keep doing it. Here’s my rationale for the other settings.
Enable hole filling - Without this enabled you’ll probably end up with portions of the texture that didn’t compute and come out completely black. I always activate this option.
Enable ghosting filter - Since texturing doesn’t take long to process, I just try with both settings and see which one comes out better. I feel like I sometimes get a better result with it disabled, as long as there no motion coming into play between images.
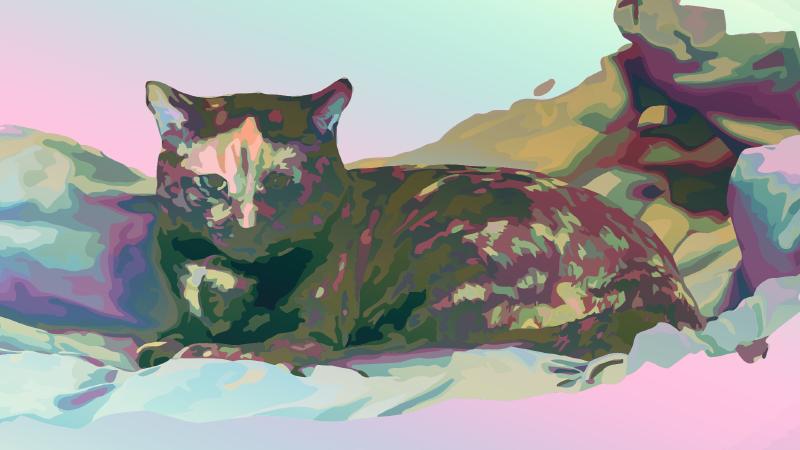
Conclusion
So I hope this post might be helpful for someone looking to do a fun experiment with live subjects. After doing this a few times, I feel like I have a bit of a better understanding of the nuanced settings to work with when doing photogrammetry scanning as well. It was also fun to try out those other programs I mentioned. I did end up running the original, unenhanced video through the same process and the result really benefitted from the first video enhancement step. I feel that was an important addition that made this possible. Thanks for reading and happy scanning!