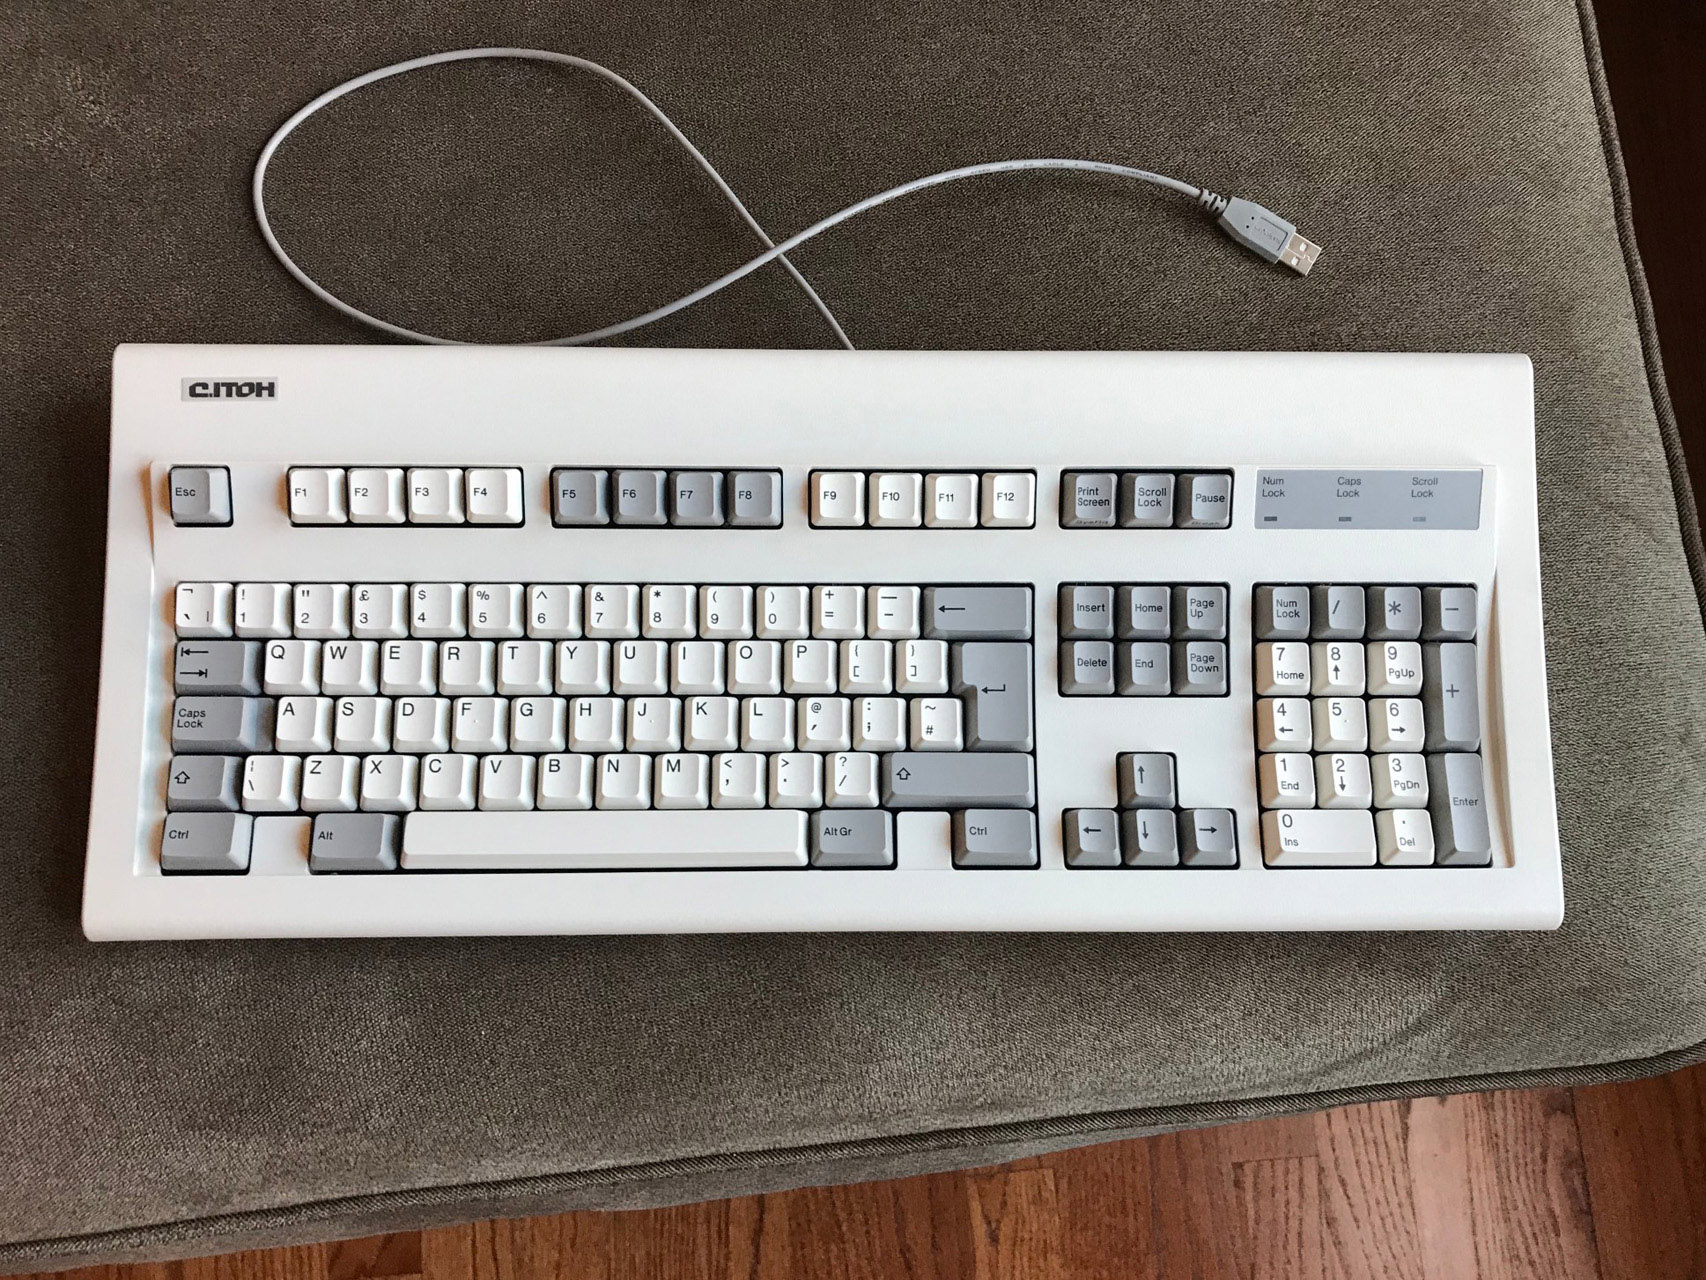
I occasionally post on the /r/mechmarket to sell things or ask if anyone is willing to sell an interesting keyboard. That’s how I came across this new-in-box C.ITOH terminal board. My post was asking for Alps or buckling spring boards. The seller responded that this board is the “best of both worlds” as it’s an Alps buckling spring board (which I didn’t even know existed). The only downside is that it was made for terminals and not modern PCs.
First Impressions
When I got it I was really excited because the click was so satisfying and unique. It was very much like a tame version of a Model M (lighter keystroke, shorter travel, less clack). I searched the web but couldn’t find any information about it at all. The keyboard itself didn’t have much identity. Even the label on the back simply reads “BRITISH”. The “Alps buckling spring” Deskthority wiki entry makes reference to an “unknown C.ITOH model” (the model number on my box says CIT342/CIT342E).
My goal was to convert it to USB and use the board as my daily driver. I’d read about how to make a Soarer’s converter but never really had the need to use one before. I picked up an RJ-11 breakout board and a Teensy and set to work trying to figure out the connection pinout. Some helpful people on /r/askelectronics and Deskthority guided me to the correct pins for power, ground, data, and … no clock? That’s odd. I tinkered with this mess for a while trying to get a readable input but got absolutely nowhere. After a while I decided to give up on converting and instead replace the whole controller. That sounded like a much more fun project anyways (Soarer’s converter took basically no effort to get working; tested with a couple PS2 keyboards).
Process
Mapping the Matrix
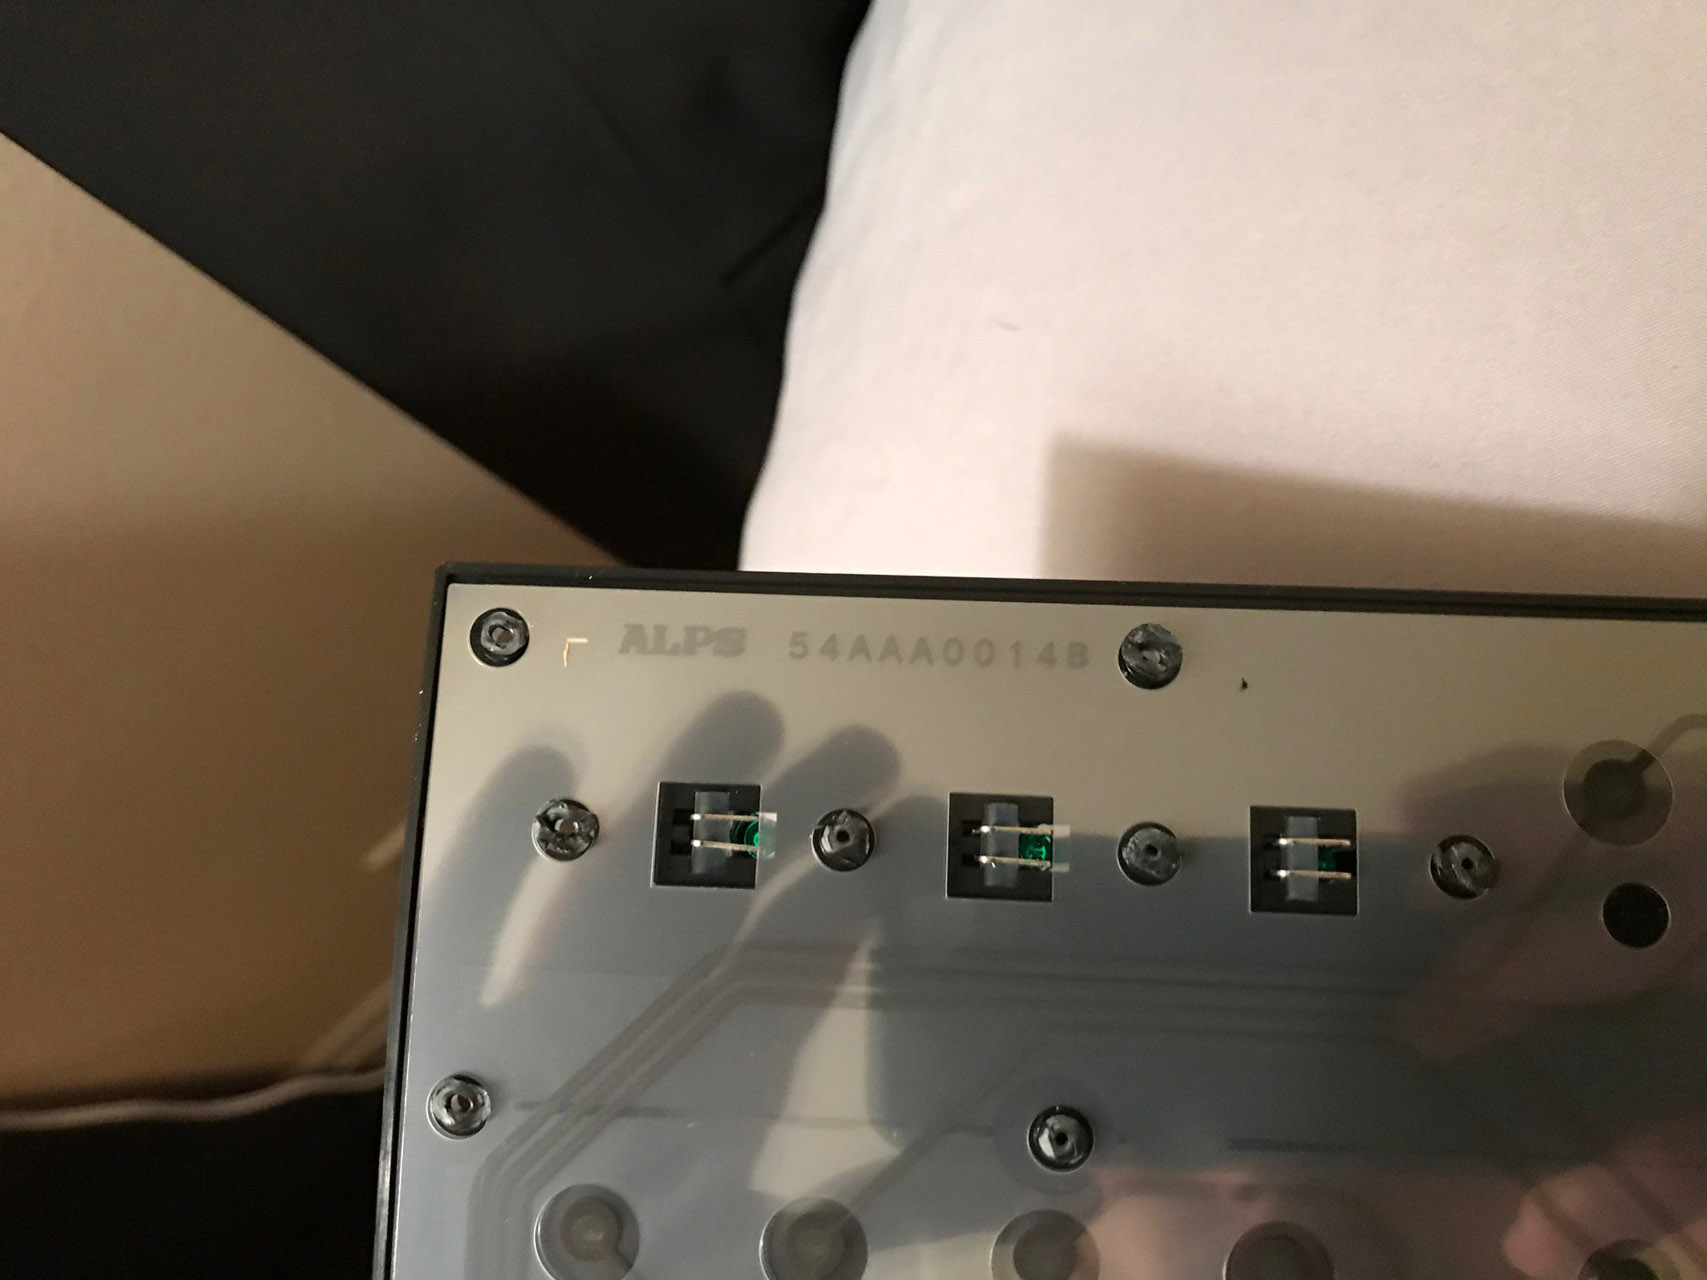
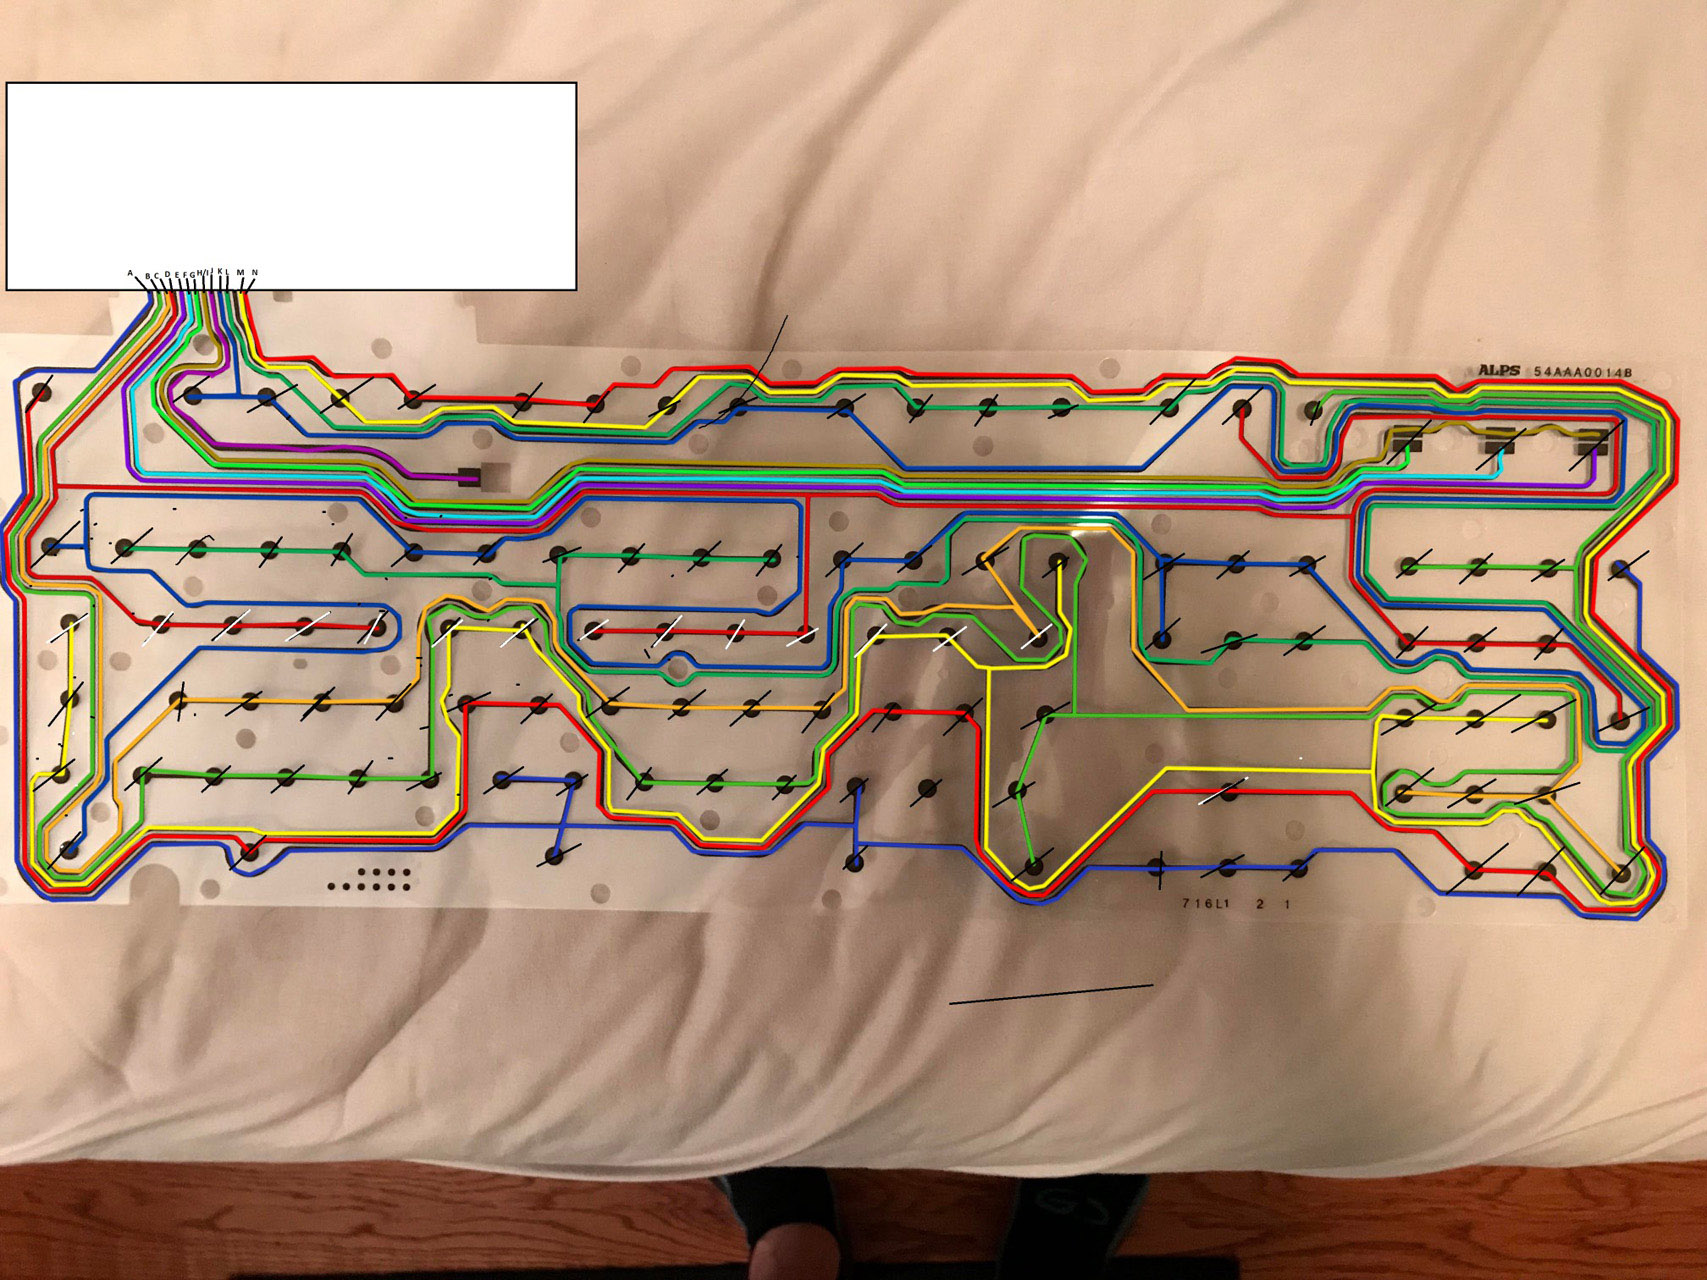
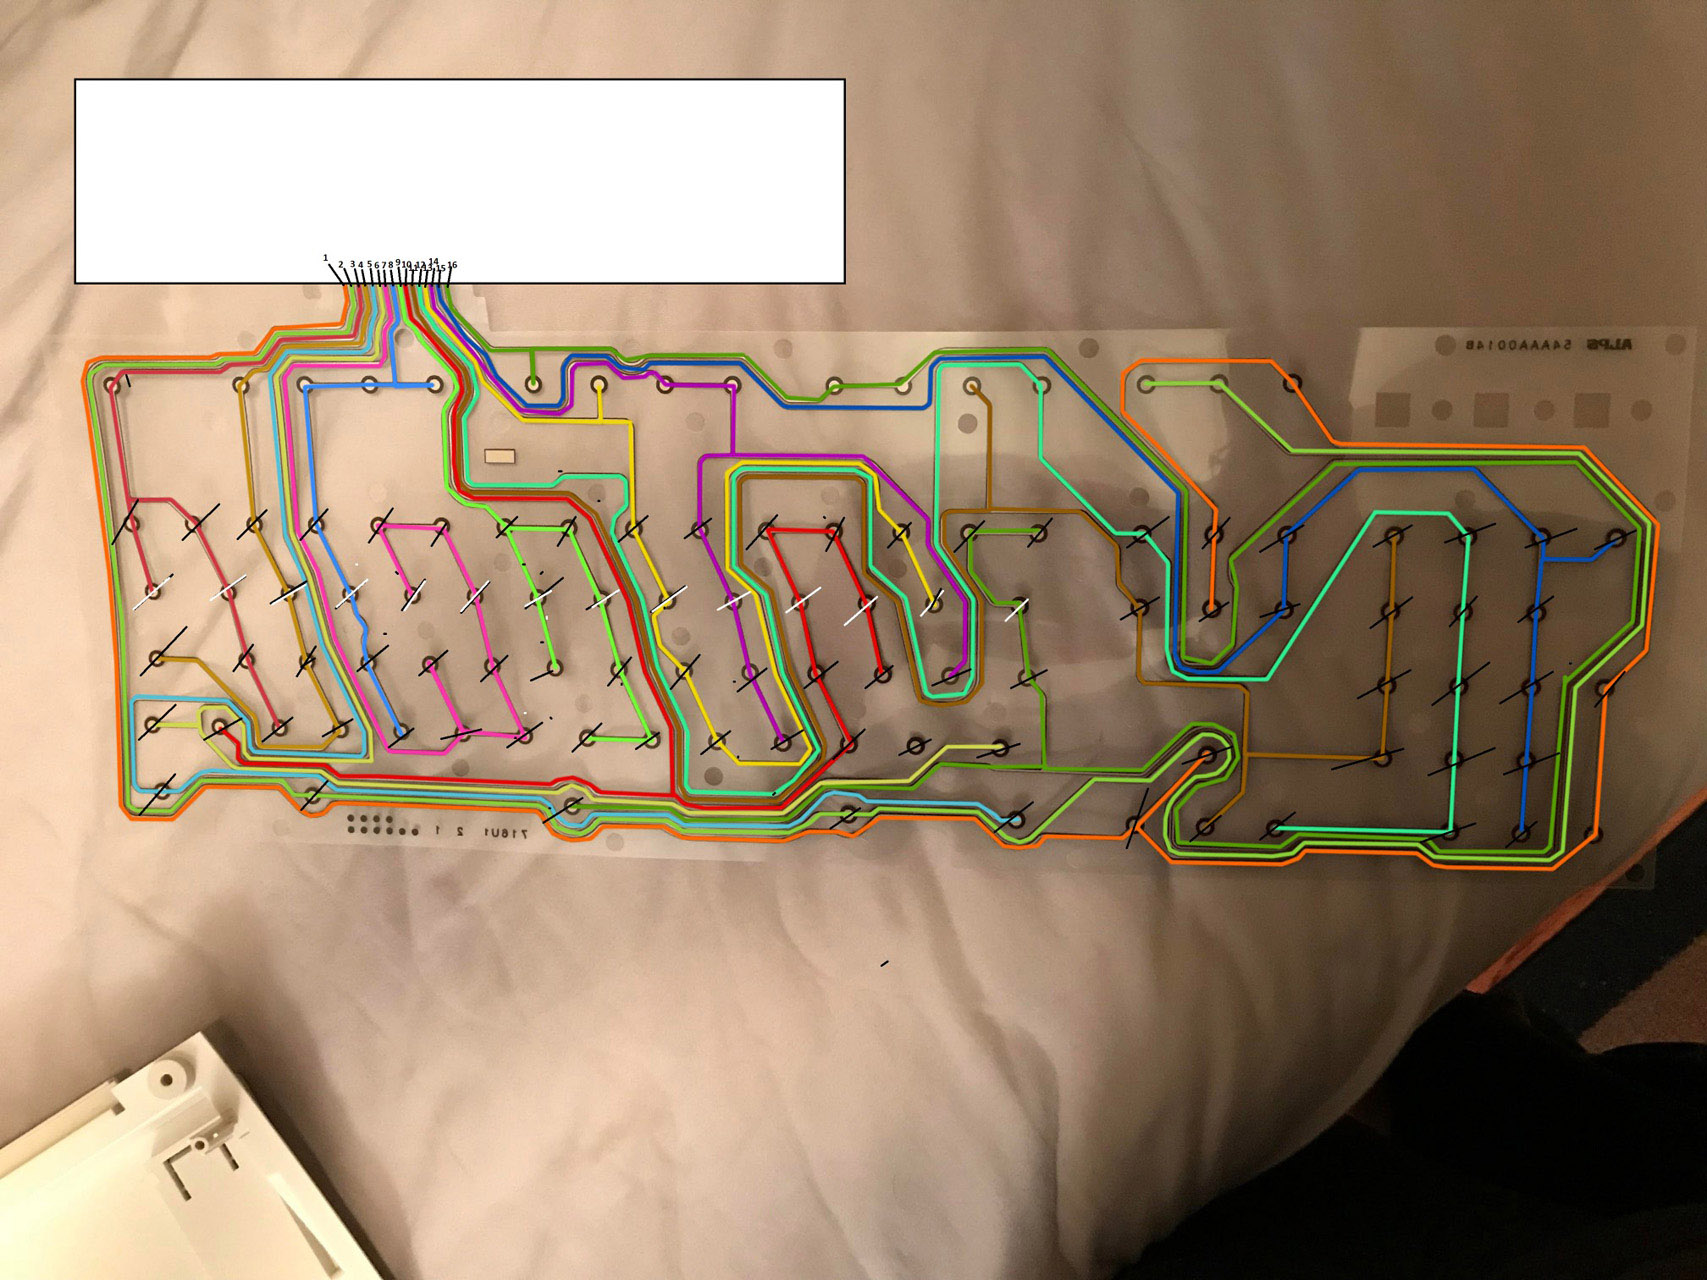
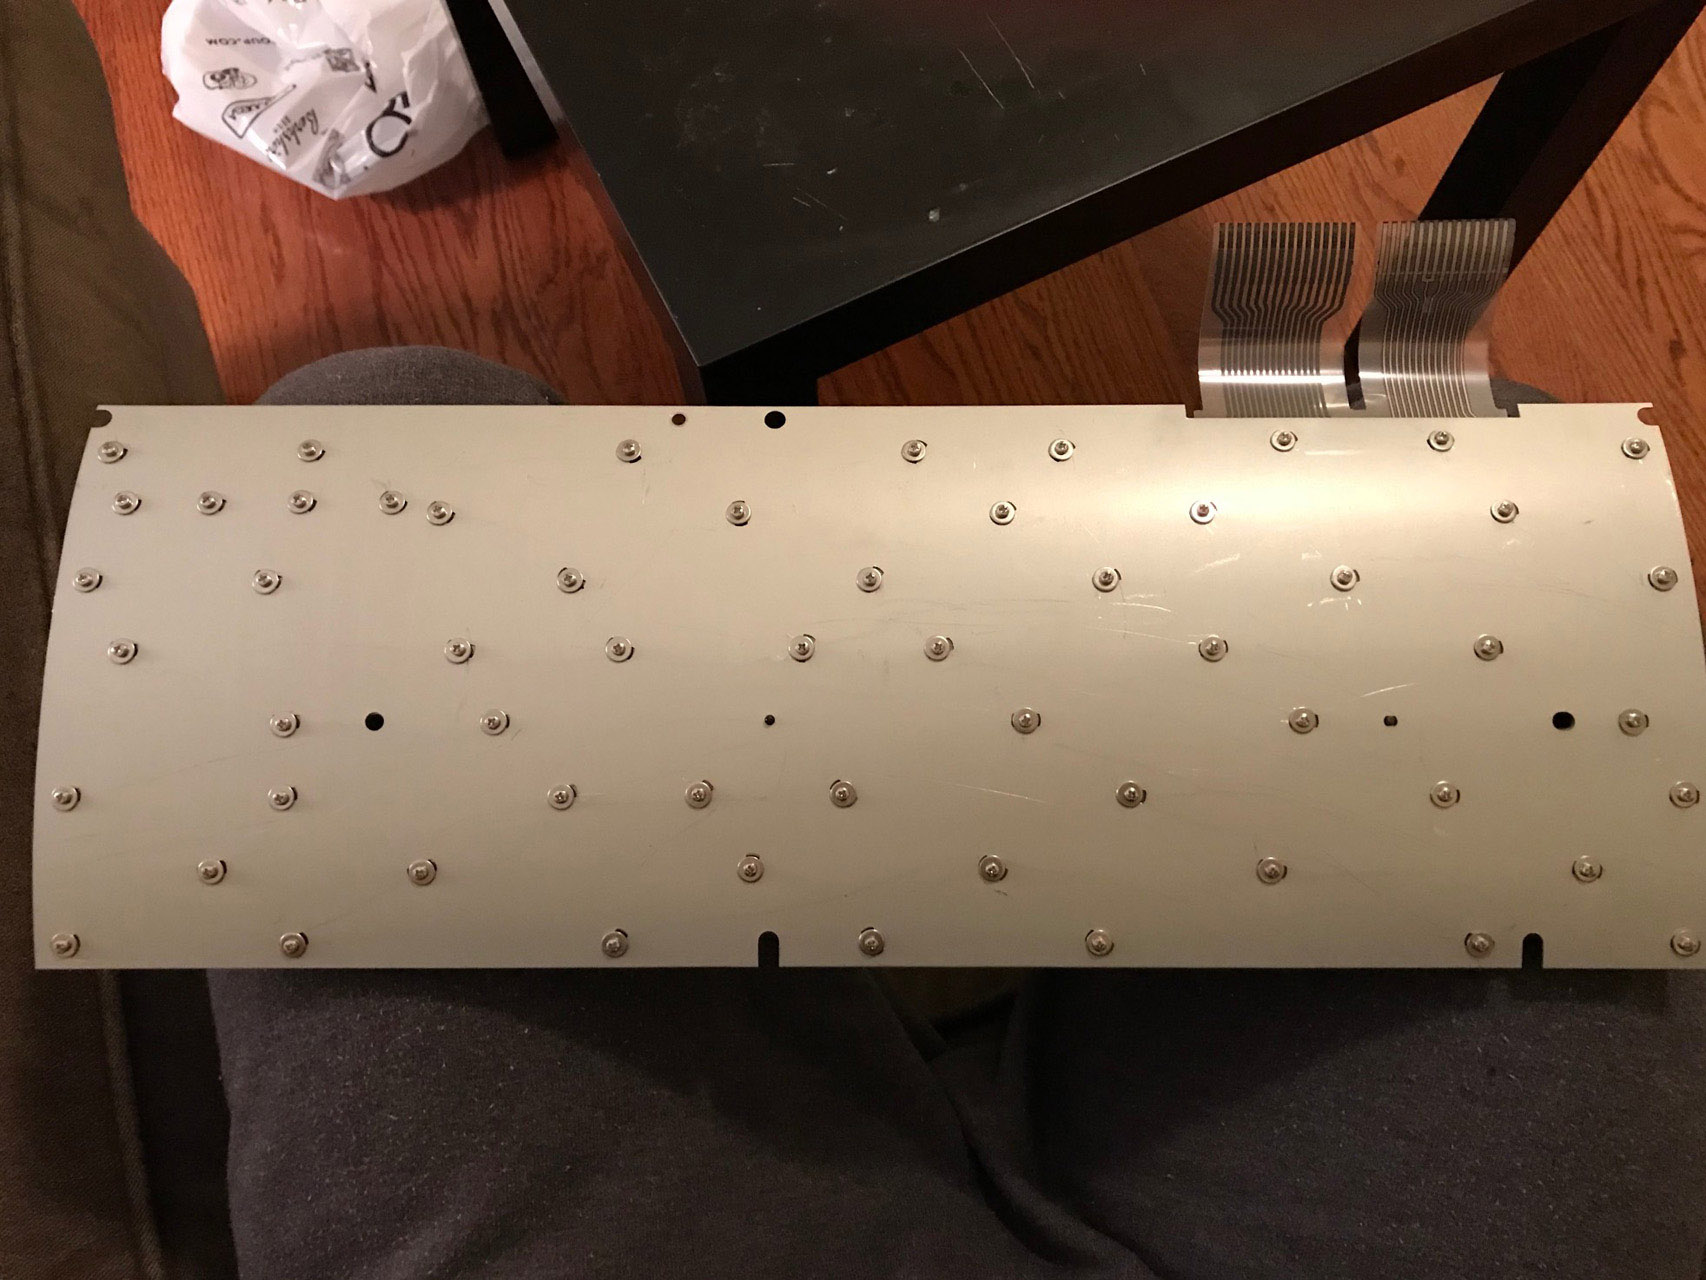
Once I knew what to search for, I started finding forum/blog posts about how to swap out the controller for a Teensy. The first step was to map out the wiring matrix on the membrane to see which wires controlled which keys. Similar to a Model M, this C.ITOH board also had plastic rivets holding the main assembly to the metal backplate. I popped each one off and opened up the board.
It was pretty interesting. Nowhere else on the board was there any reference to the Alps brand. Finally on the membrane we can see a logo.
I took some photos of the membranes and then mapped out the wiring on my PC, using a different color for each track. I’m not sure if this is the most efficient way to do the mapping but it seemed like a good idea at the time.
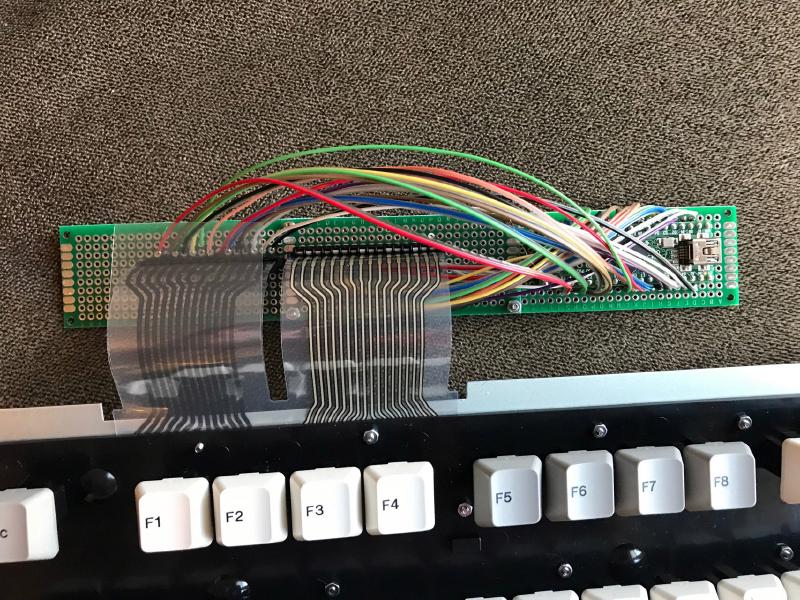
Building the Controller
Things that I picked up to build the replacement controller:
- Teensy++ (has more pins)
- Rainbow ribbon cable
- FPC connectors
- PCB perf board
Assembling the Frankenstein controller was simple enough. Just had to wire each contact of the FPC connector to an open pin on the Teensy.
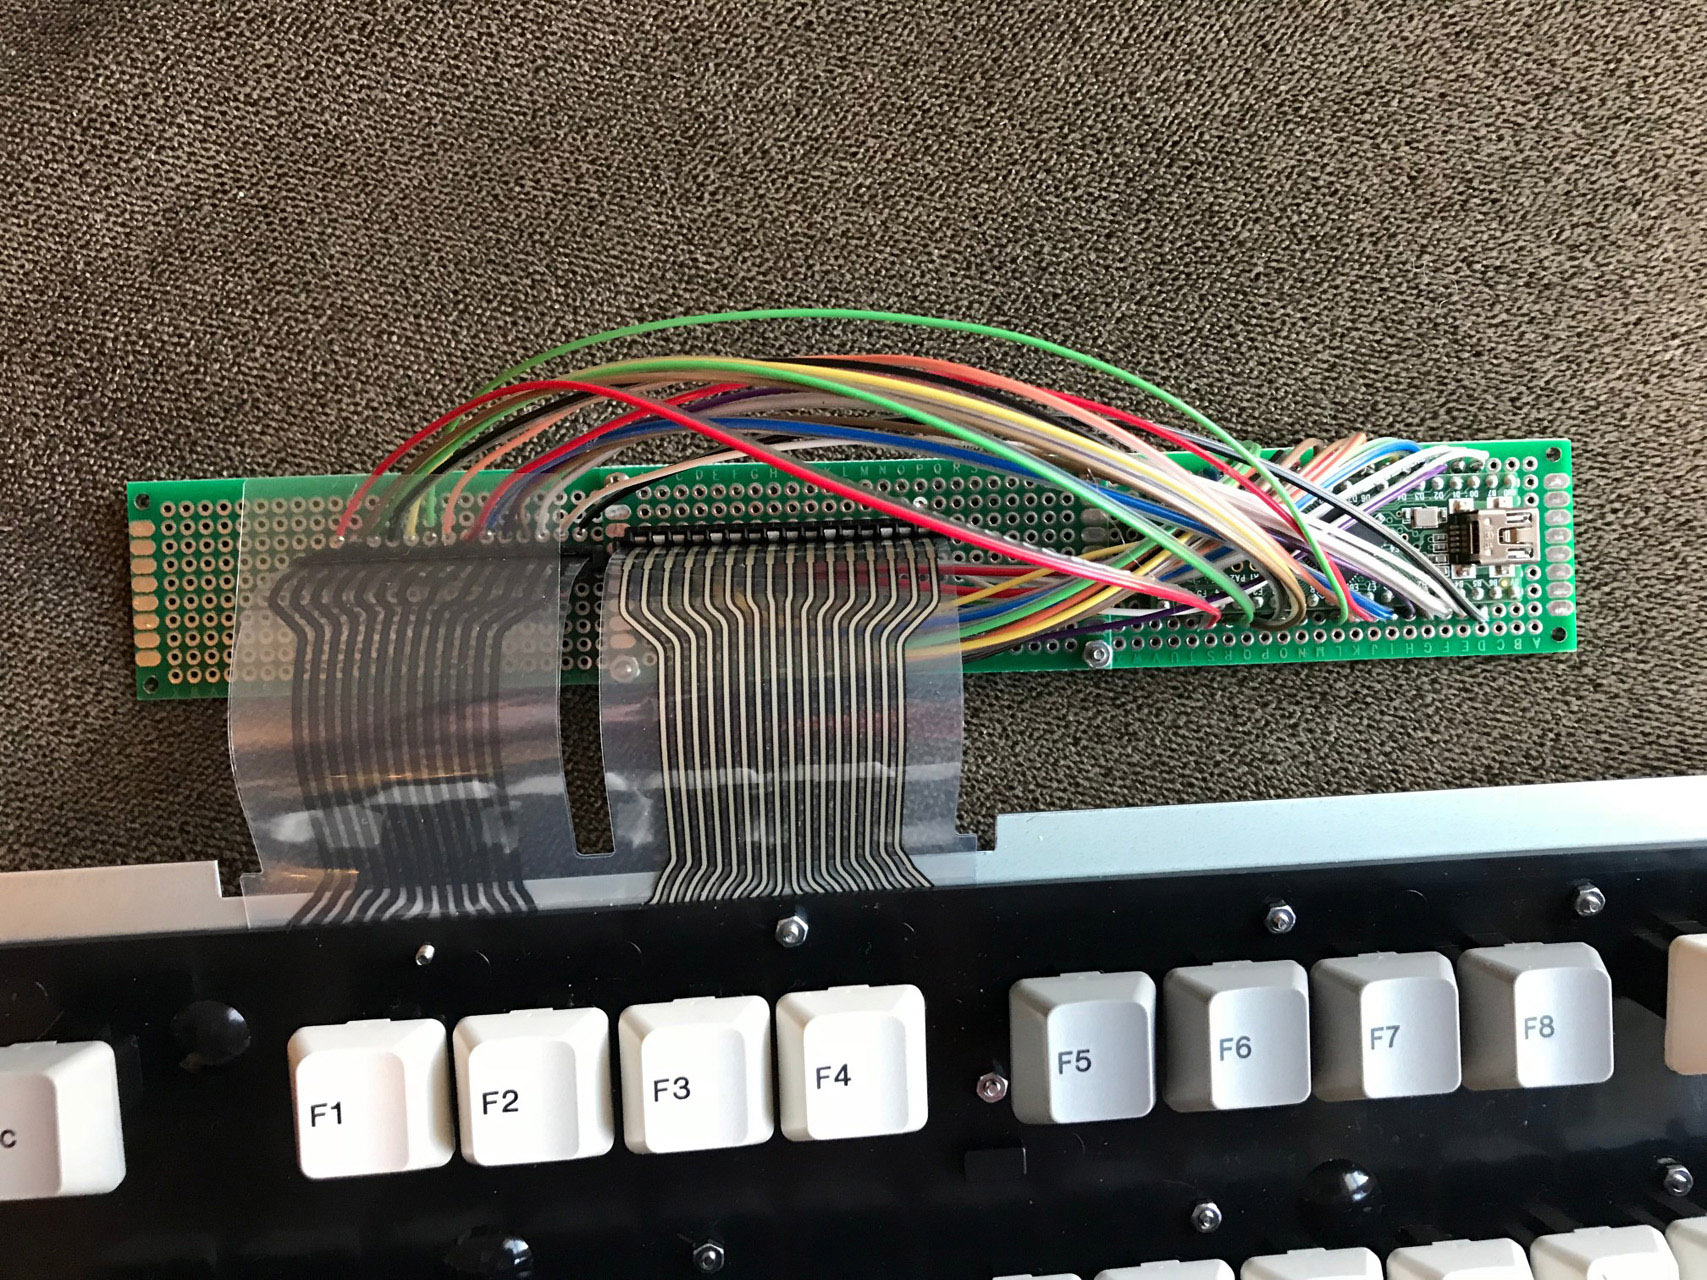
Next I used the very helpful website kbfirmware.com to compile a QMK firmware file. This step actually took much longer than I expected. The hard part was translating my membrane matrix to the corresponding keys to know which Teensy pins are controlling which keys.
After a few iterations of tweaking the mapping and retesting, I finally had a functional keyboard! My intention was to get the lock key LEDs working as well but I couldn’t figure that part out and quickly gave up. Maybe I’ll revisit that some day.
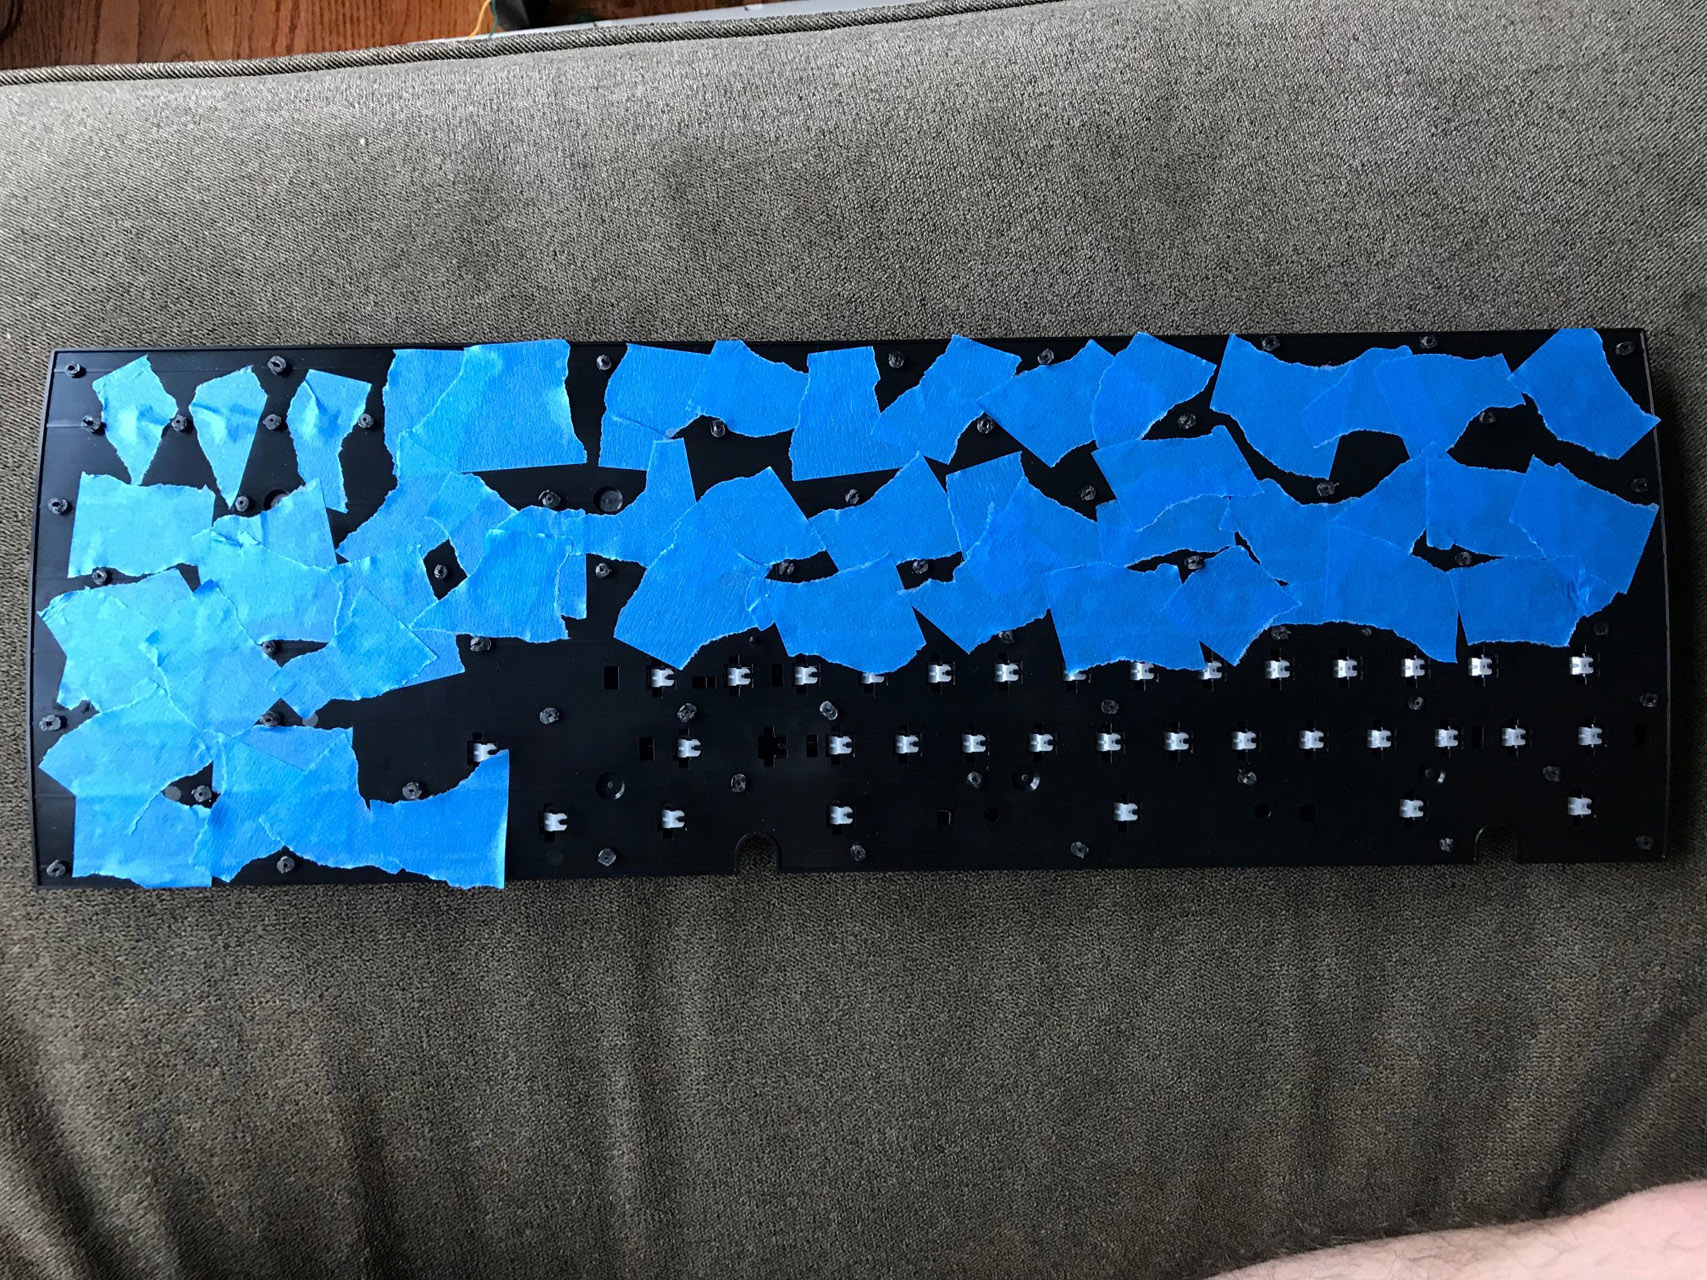
Bolt Modding
Since I had removed all of the plastic rivets, I had to bolt mod the keyboard out of necessity. This step shouldn’t be needed if you know how the matrix is mapped out. I’d never done this before but it was a pretty simple process. The basic steps are like this:
- Remove the plastic rivets
- Tape off the board with masking tape so that no plastic flecks get in the switches
- Sand down each rivet with a dremel
- Use a hot soldering iron to poke a little hole where each rivet was
- Drill each hole
- Attach screws/washers/nuts
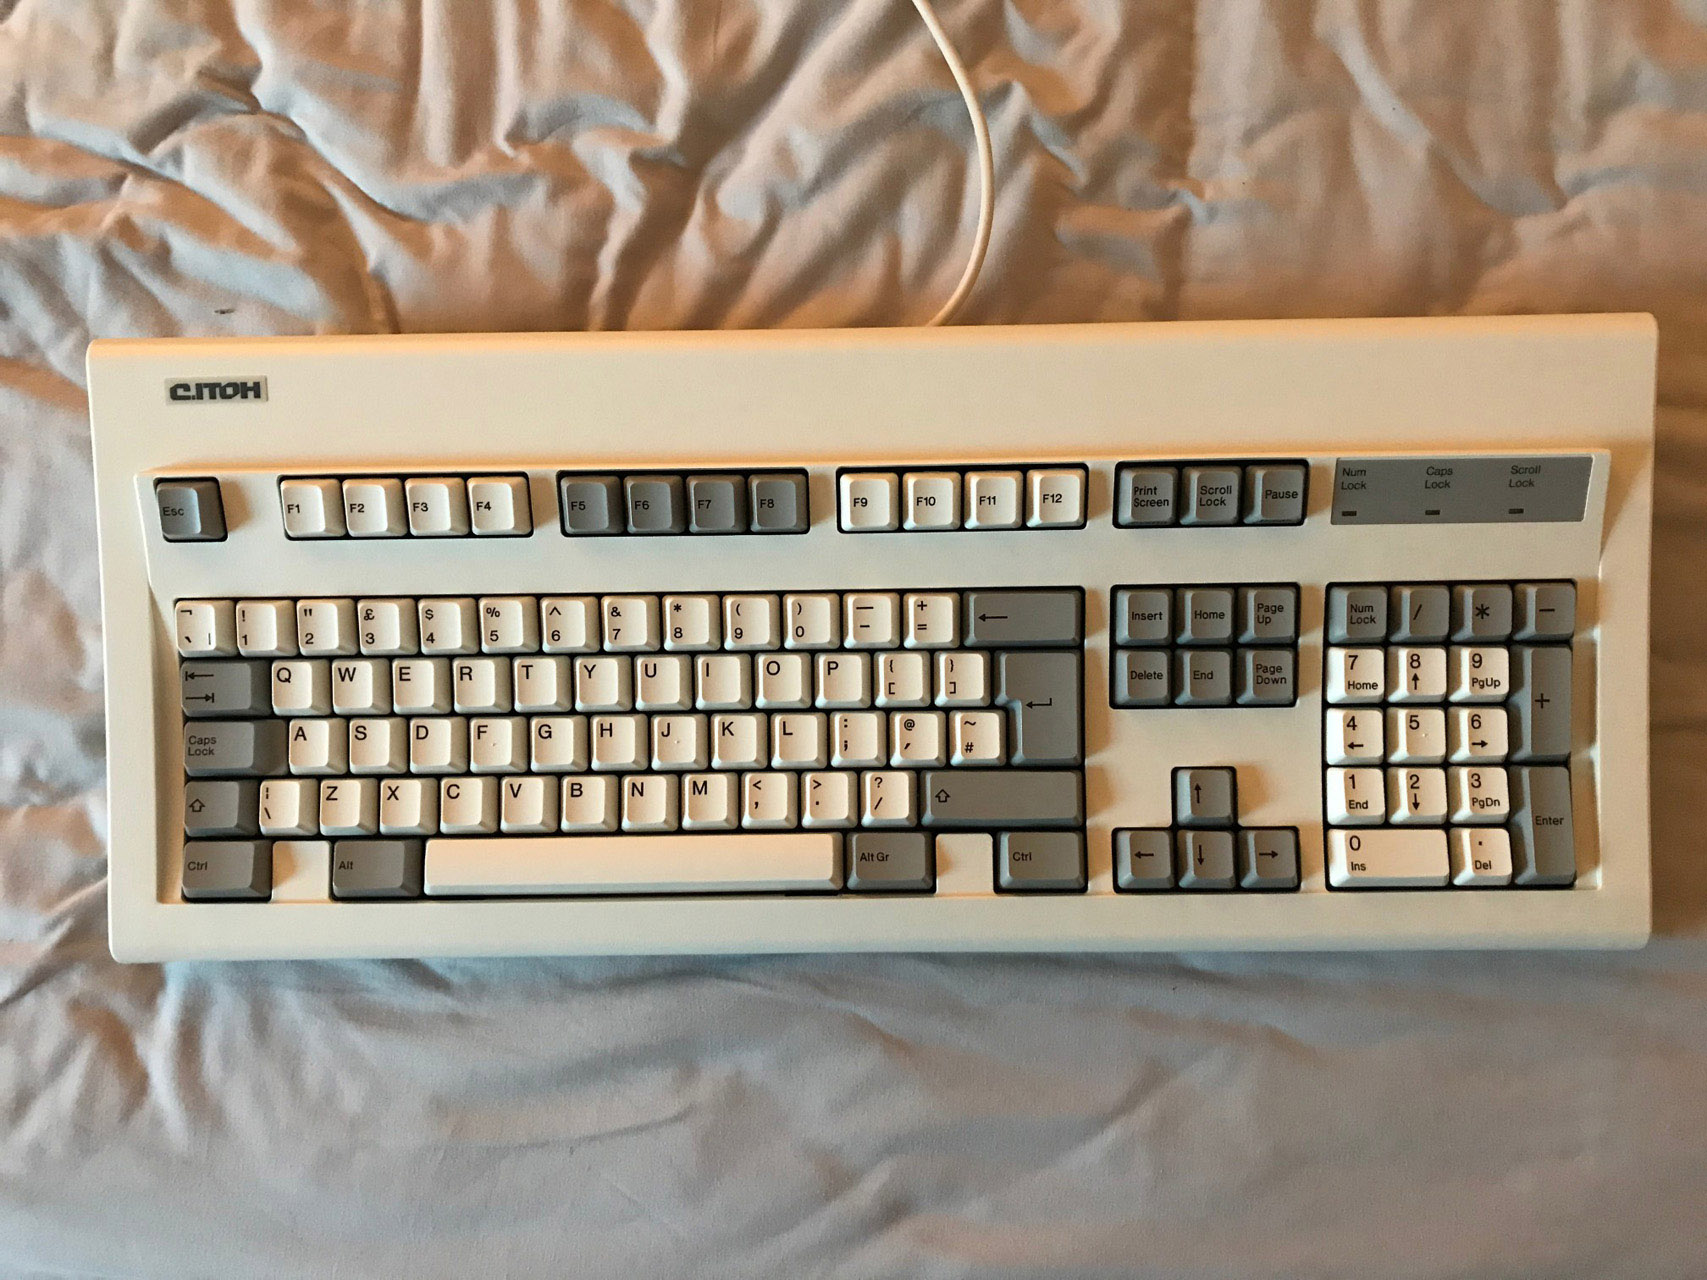
Finished Product
So now I’m the proud owner of an Alps buckling spring keyboard. Here’s a picture of the completed board (with my SSK in the somewhere probably looking like a jilted lover).